Windows 11 is the latest operating system from Microsoft, offering improved performance and exciting features. To run your system smoothly and efficiently, it is important to troubleshoot and diagnose any issues that may be affecting its performance. To achieve this, you need to know how to perform Clean Boot on Windows 11.
This method on Windows is simple and effective to troubleshoot and resolve performance issues. By disabling non-essential programs and services, you can identify potential conflicts and improve your system's overall stability.
In this article, we'll walk you through the quick and easy steps to perform a Clean Boot and get your computer running smoothly again.
Does clean boot delete programs?
No, a Clean Boot does not delete programs or any user data from your computer. It only disables non-essential services and startup programs, leaving your installed applications and files intact. When you perform a Clean Boot, you are starting Windows with a minimal set of drivers and services, which helps troubleshoot and diagnose issues that third-party software conflicts might cause.
How do I clean boot on Windows 11?
You can perform a clean boot on your Windows device in many ways on Windows 11. Here are the most common ways to do it:
1. Using System Configuration:
To perform a Clean Boot on Windows 11 using System Configuration, follow these simple steps:
- Press the Win + R key to open the Run dialog box.
- Type the following command and hit Enter:
msconfig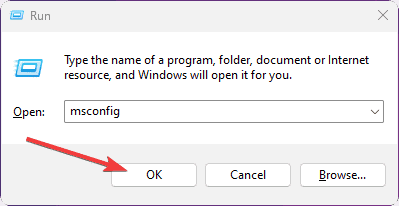
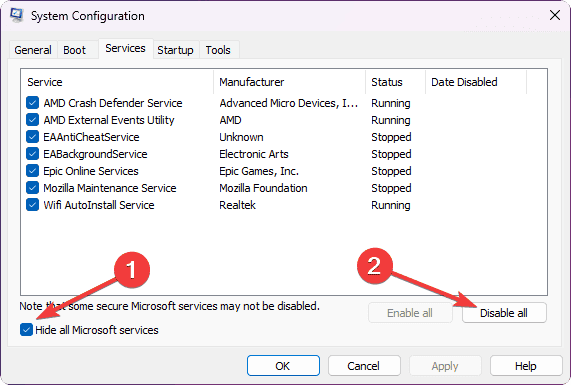
- Then go to the Services tab in the System Configuration window.
- Check the box labeled Hide all Microsoft services located at the bottom left corner. This will ensure that you don't disable any critical Windows services.
- Next, click on the Disable all button. This will disable all non-Microsoft services that may be running on your system.
- Afterward, navigate to the Startup tab.
- Now click on Open Task Manager. The Task Manager will open, displaying a list of startup programs.
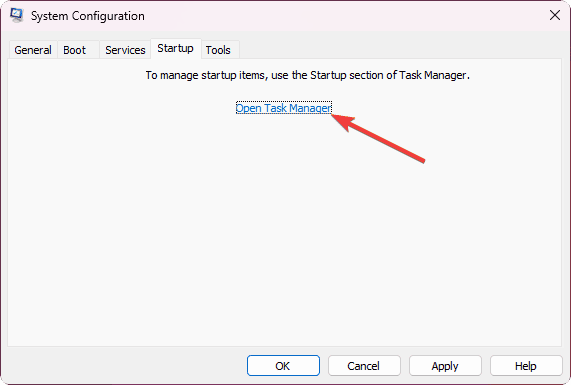
- Disable all the startup programs by selecting each entry and clicking Disable.
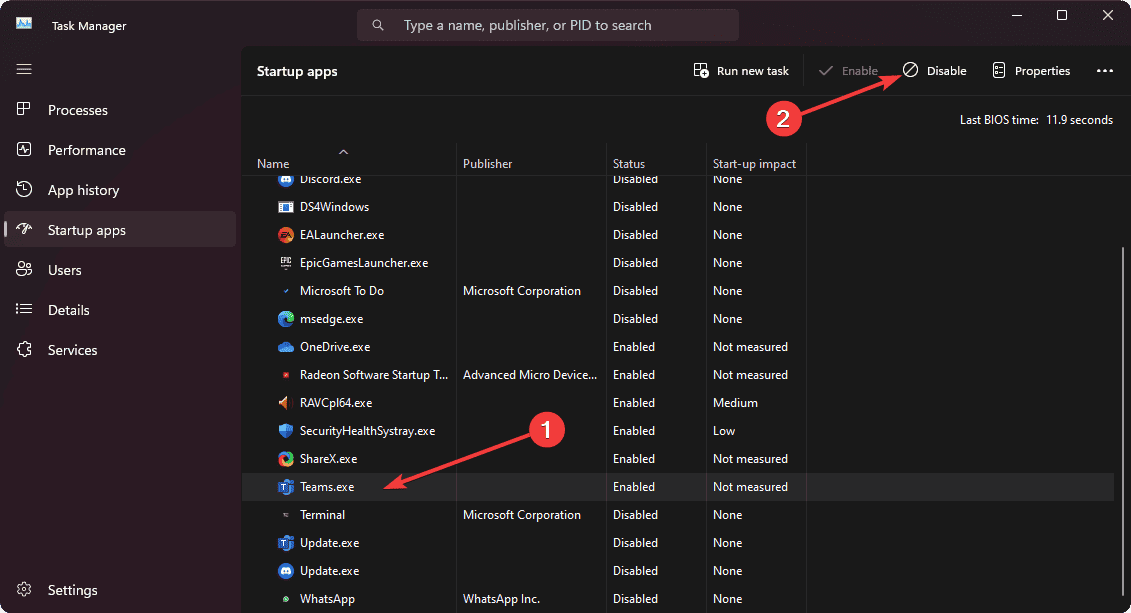
- With all the non-Microsoft services and startup programs disabled, click OK in the System Configuration window.
- You will be prompted to restart your computer. Save any unsaved work and click Restart.
Following these steps will initiate a Clean Boot, enabling you to identify and resolve potential software conflicts that may be impacting your system's performance.
2. Clean Boot via System Configuration in Safe Mode:
If you encounter persistent issues on Windows 10 or 11 and suspect that third-party software may be causing the problem, you can perform a Clean Boot in Safe Mode. Safe Mode ensures that your computer starts with only essential services and drivers. Here's how you can do it:
- Open the Run dialog box like before.
- Type the following command and hit Enter:
msconfig
- Go to the Boot tab in the System Configuration utility
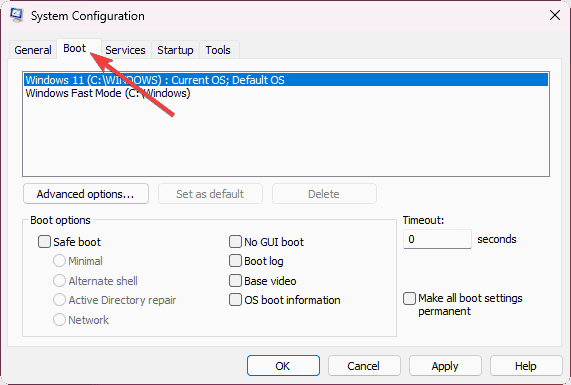
- Check the box labeled Safe boot and select Minimal.
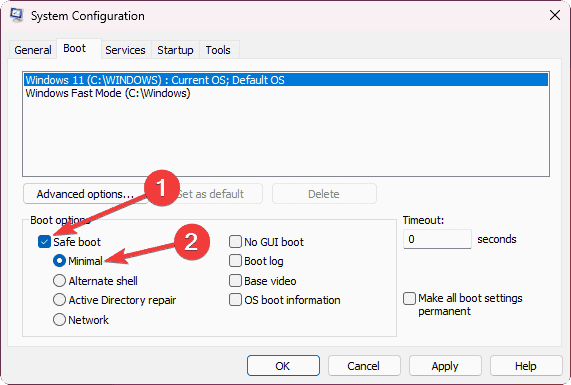
- Click OK and restart your computer.
- Your computer will start in Safe Mode with only essential services and drivers running.
- In Safe Mode, repeat the steps from Method 1 to disable non-Microsoft services and startup programs.
By performing a Clean Boot in Safe Mode, you can better find out the cause of any issues, as it eliminates the possibility of third-party software conflicts during the diagnostic process.
3. Using Windows Terminal:
If you prefer using the Windows Terminal to perform a Clean Boot on Windows 11, follow these steps:
- Press the Win+X key and select Terminal (Admin) from the power menu.
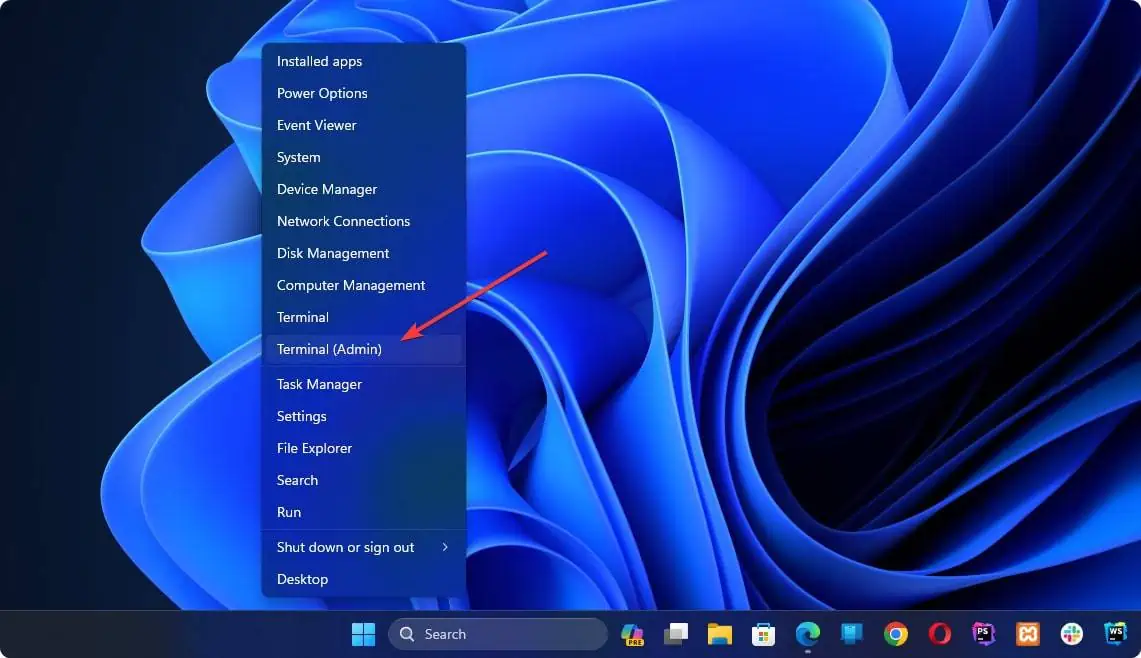
- In the terminal window, type the following command and press Enter:
Get-Service | Where-Object {$_.Status -eq "Running" -and $_.StartType -eq "Auto"} | Stop-Service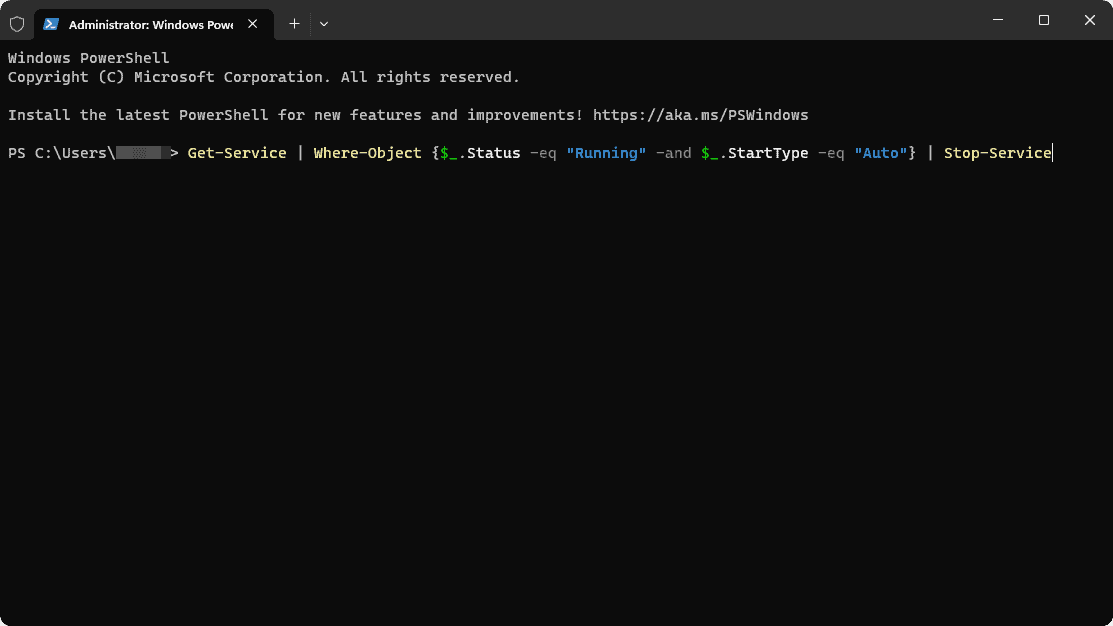
This command will stop all currently running services that are set to start automatically.
- Next, to disable these services from starting at boot, type the following command and press Enter:
Get-Service | Where-Object {$_.StartType -eq "Auto"} | Set-Service -StartupType Disabled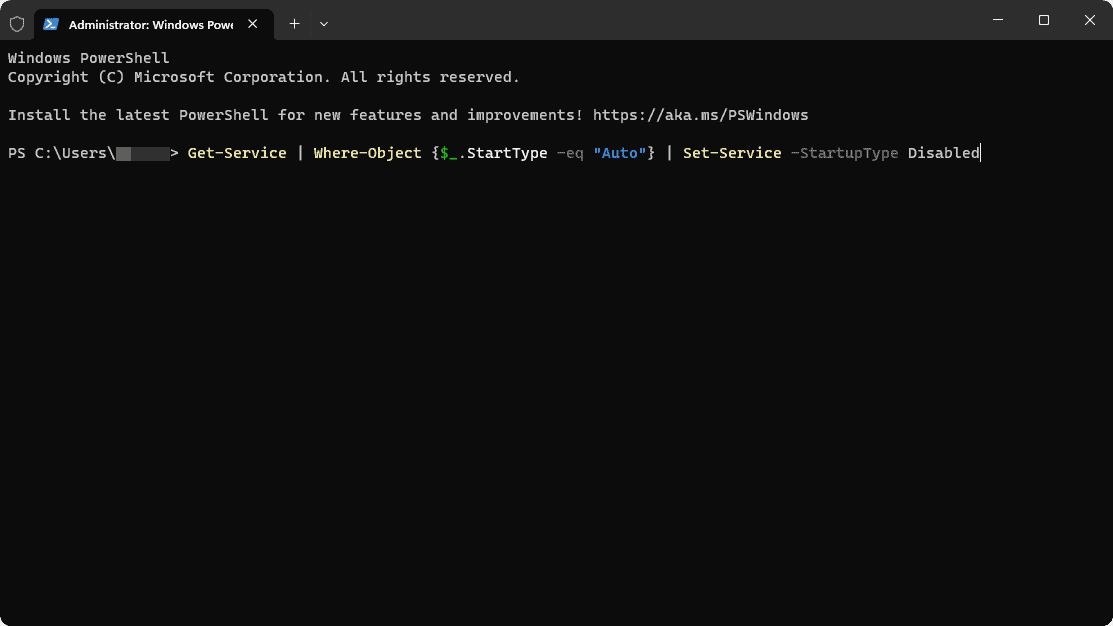
- To disable startup programs, type the following command and press Enter:
Get-AppxPackage -AllUsers | Remove-AppxPackage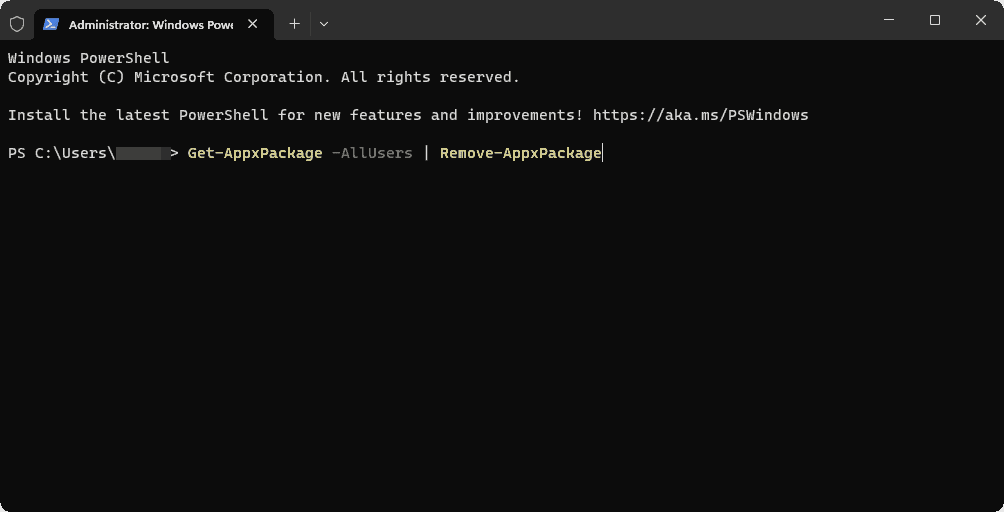
This command will remove all Windows Store apps from starting at boot.
- Now, Restart your computer.
Now that you successfully performed a clean boot on your Windows, you can troubleshoot your device for any issues you are encountering. After resolving your issue, you can restore to a Normal state by following these steps:
- Go to the System Configuration window like before and navigate to the General tab.
- Then, select Normal startup from the Startup selection.
- Now, Click Apply and OK.
- Lastly, Undo the changes you have performed in Method 1.
- Restart your computer.
Your computer will now start up in its normal state.
Performing a Clean Boot on Windows 11 is a powerful troubleshooting method to diagnose and resolve various system performance issues. By turning off third-party services and startup programs, you can determine if the problem is caused by conflicting software.
Remember to create a backup before initiating the Clean Boot process and proceed carefully while enabling services and programs. With this guide, you can now maintain your Windows 11 system at peak performance, ensuring a smooth and efficient computing experience.


