
If you're facing update-related issues or have noticed your system's performance lagging on Windows 11, chances are the SoftwareDistribution folder might be causing the trouble. This folder is an important component of Windows Update, and sometimes, it can become corrupted or filled with unnecessary files, leading to update failures or sluggish performance.
In this article, we will talk about what is this folder. Also, we'll teach you how to reset the SoftwareDistribution folder on Windows 11, ensuring a smoother and more optimized computing experience.
What is SoftwareDistribution Folder?
Before we explore the reset process, let's understand the SoftwareDistribution folder and why it's essential for your Windows 11 system. This folder acts as a temporary archive for Windows updates and components required for smooth installation. It also stores Update history and logs. Over time, the folder can accumulate a significant amount of data, potentially leading to issues.
How do I clear or reset SoftwareDistribution Folder
Now that you understand the importance of resetting the SoftwareDistribution folder, let's walk through the steps to perform this task. Follow these methods step by step:
1. Stop Windows Update Service
The first step is to stop the Windows Update Service to ensure no active processes interfere with the reset process. You can do it using Run Dialog Box or Terminal, whichever you prefer:
1.1 Using Run Dialog Box:
- Press the Win + R key to open the Run Dialog Box.
- Then, type the following command and hit Enter:
services.msc
- Lastly, locate Windows Update in the list, right-click on it, and select Stop.

1.2 Using Terminal:
- Right-click on the Windows Logo and select Terminal (Admin).
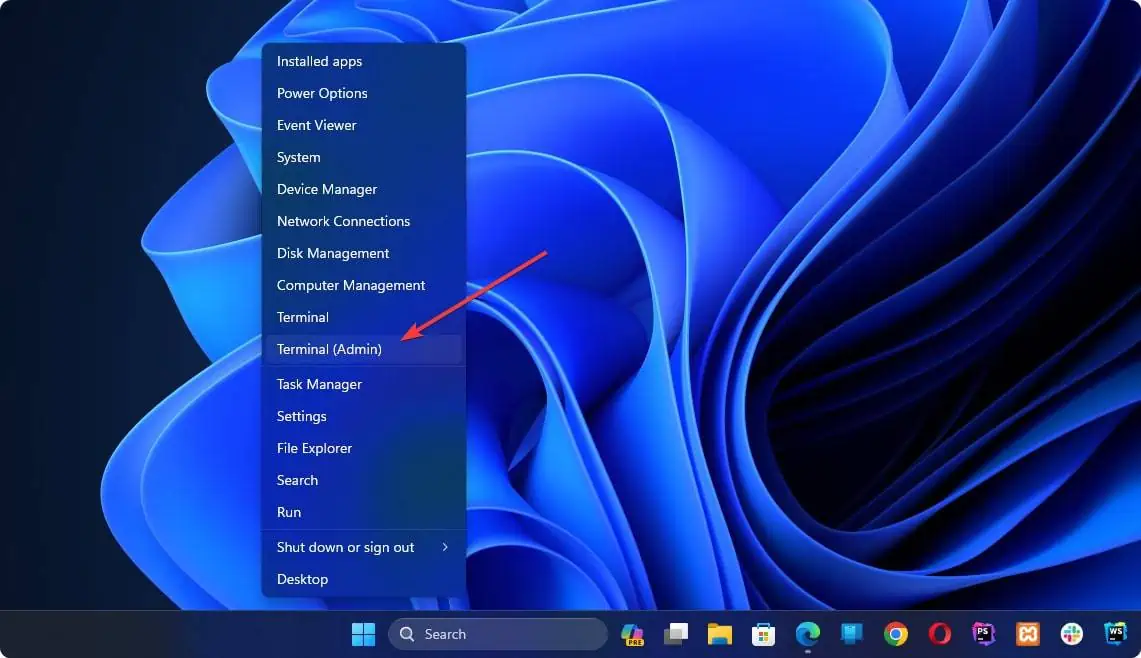
- Then, type the following commands and press Enter after each one:
net stop wuauser
net stop bits
These commands will stop the Windows Update and Background Intelligent Transfer Services.
2. Rename or Clear SoftwareDistribution Folder
After stopping the Windows update, the next step is to Rename or Delete all the files from the SoftwareDistribution folder. Follow the methods you want, whether to rename or clear it.
2.1 Rename SoftwareDistribution Folder
- Press the Win + E key to open File Explorer.
- Then, navigate to C:\Windows.
- Lastly, locate and rename the SoftwareDistribution folder (e.g., SoftwareDistribution.old)

2.2 Clear SoftwareDistribution Folder
- Open File Explorer like before.
- Then, navigate to the following folder: C:\Windows\SoftwareDistribution

- Press the Ctrl + A key to select all the files and folders in the folder.

- Press the Del key to delete all of the files and folders.
Note: If you're unable to delete some of the files, you can restart your computer and try again.
3. Start Windows Update Service
After performing the previous steps, you can start the Windows Update service aging by using the Run dialog box or by Terminal as Administrator. Start the Windows Update by following any of the methods:
3.1 Using Run Dialog Box:
- Open the Run Dialog Box like before.
- Then, type the following command and hit Enter:
services.msc - Right-click on Windows Update and choose Start.
3.2 Using Terminal:
- Open Terminal (Admin) like before.
- Then, type the following commands and press Enter after each one:
net start wuauserv
net start bits
These commands will start the Windows Update and Background Intelligent Transfer Services.
4. Check for Updates
Once the service is restarted, you can check for updates to start the creation of a new SoftwareDistribution folder by:
- Press the Win + I to open the Settings app.
- Go to Windows Update.
- Then, click on Check for updates and let Windows search for available updates.

5. Restart Your PC
After successfully checking for updates, Restart your PC to ensure all changes take effect.
Additional tips for resetting the SoftwareDistribution folder:
Here are some additional steps you can follow if the above method don't work for you:
- You can also try running the Windows Update troubleshooter. To do this, open Settings and go to System > Troubleshoot > Other trouble-shooters > Windows Update. Click on Run and follow the instructions.
- If you're still having problems, you can contact Microsoft support for help.
Resetting or clearing the SoftwareDistribution folder on Windows 11 can be a simple yet effective solution to address update failures and optimize your system's performance. By following the steps, you can easily clear out unnecessary files, resolve update-related issues, and enjoy a smoother computing experience. Remember that performing this reset is a safe process and can significantly contribute to the health and functionality of your Windows 11 system.


