
As technology advances, so do we depend on computers for various tasks. However, the convenience of using computers comes with the risk of potential system errors or crashes. To protect your PC and revert to a stable state in times of trouble, You must know how to use system restore on Windows 11.
In this article, we will provide the process of using System Restore on Windows 11, ensuring your system remains secure and error-free.
If necessary, learn how to perform clean boot on Windows.
Does Windows 11 create System Restore points automatically?
Yes, Windows 11 creates system restore points automatically by default, but it might not create restore points automatically for all scenarios. The creation of automatic restore points depends on certain factors and actions within the system.
By default, Windows 11 automatically creates restore points in the following situations:
- Before Windows Updates: When Windows installs important updates or makes significant changes to the system, it will typically create a restore point automatically. This allows you to revert to a stable state if the updates cause any issues.
- Before Certain Software Installations: Some software installations automatically trigger Windows to create a restore point. This helps ensure that you can easily undo the changes if the software causes conflicts or problems.
However, it's essential to note that automatic restore point creation might not cover every scenario. Windows might not create restore points when installing all types of software or performing minor system changes.
How do I use System Restore on Windows 11 properly?
Using System Restore on Windows 11 properly involves these options:
- Accessing System Restore.
- Creating a Restore Point.
- Restoring to a Previous State.
Now we’ll guide you through detailed methods of these options and how you can use them properly:
1. Enable System Restore
If you want to check whether your System Resore is enabled by default, or if you want to enable it on your own, then follow these simple steps:
- Press the Win + R key to open the Run dialog box.
- Type the following command and press Enter:
sysdm.cpl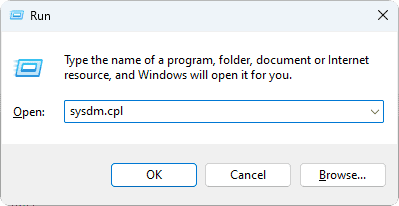
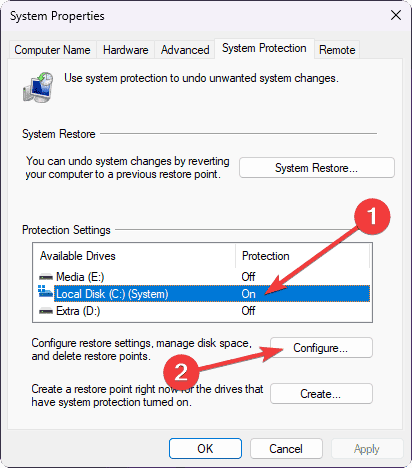
- In the System Properties window, navigate to the System Protection tab.
- You'll see a list of drives on your computer. Select the drive (usually the C: drive) where you want to enable System Restore.
- Click on the Configure button located at the bottom of the window.
- Then, select the option Turn on system protection.
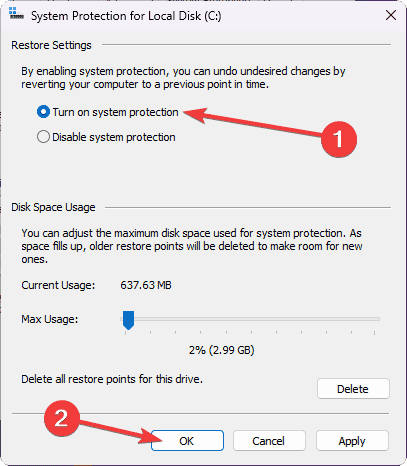
- You can adjust the maximum disk space by moving the slider. A larger space will allow you to create more restore points, but it will use more disk space.
- Click Apply and then OK to enable System Restore on the selected drive.
- If prompted, confirm your action by clicking Yes.
2. How to Create a Restore Point on Windows 11
You can create a Restore point manually for later use. To do this, follow these steps:
- Open the Run dialog box like before.
- Type the following command and press Enter:
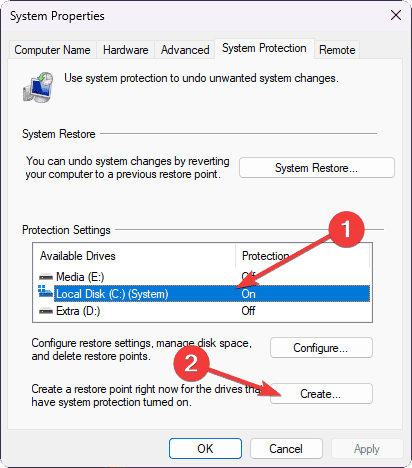
sysdm.cpl - In the System Properties window, navigate to the System Protection tab.
- You'll see a list of drives on your computer. Select the drive (usually the C: drive) where you want to enable System Restore.
- Click on the Create button at the bottom of the window.
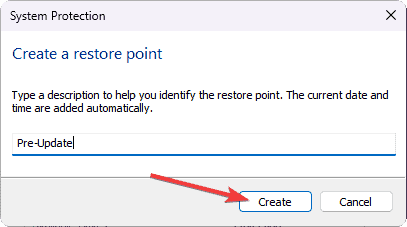
- Enter a name for the restore point, such as Before Software Installation or Pre-Update, to help you identify it easily later on.
- Click Create to initiate the creation of the Restore point. This process may take a few moments.
- Once the process is complete, you will receive a confirmation message that the restore point was created successfully. Click OK to close the message.
By following these steps, you can successfully create a restore point manually on your Windows 11.
3. How to restore to a previous state?
Restoring your system to a previous state will not affect your personal files. However, it will remove any software, drivers, or updates that were installed after the restore point was created. To perform this, follow these steps:
3.1 Restoring through System Properties:
- Open the Run dialog box like before.
- Type the following command and press Enter:
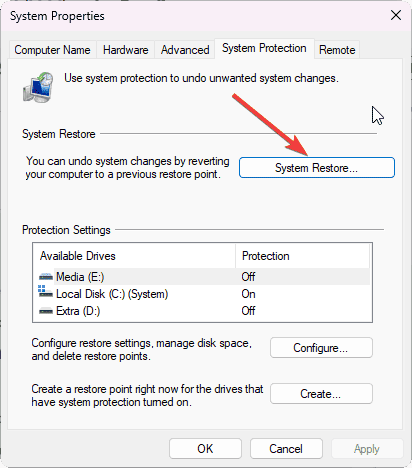
sysdm.cpl - In the System Properties window, navigate to the System Protection tab.
- Click on the System Restore button located in the System Restore section.
- A new window will open, presenting you with two options: Recommended restore and Choose a different restore point.
- Select Choose a different restore point so that you can choose between different restore points.
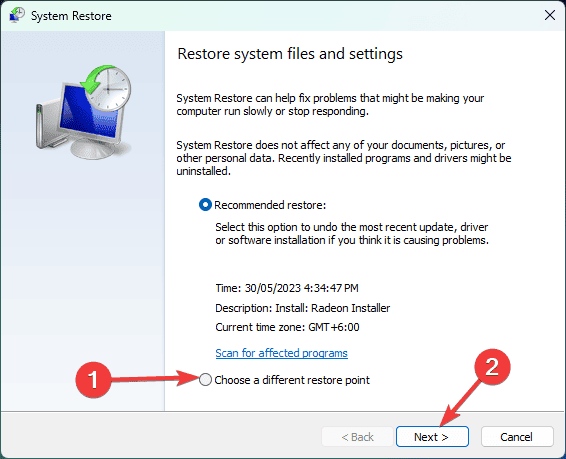
- Click Next to see the available restore points on your computer.
- Choose the desired restore point from the list that represents the state you want to revert to. Each restore point will have a date and time associated with it.

- Click Next to proceed.
- Before proceeding, make sure to save any unsaved work and close all open applications. Restoring your system will require a restart.
- Click Finish to begin the restoration process.
- Windows 11 will now restore your PC to the selected state using the chosen restore point. The process may take some time, and your computer will restart during this process.
3.2 Restoring through Advanced Startup Options:
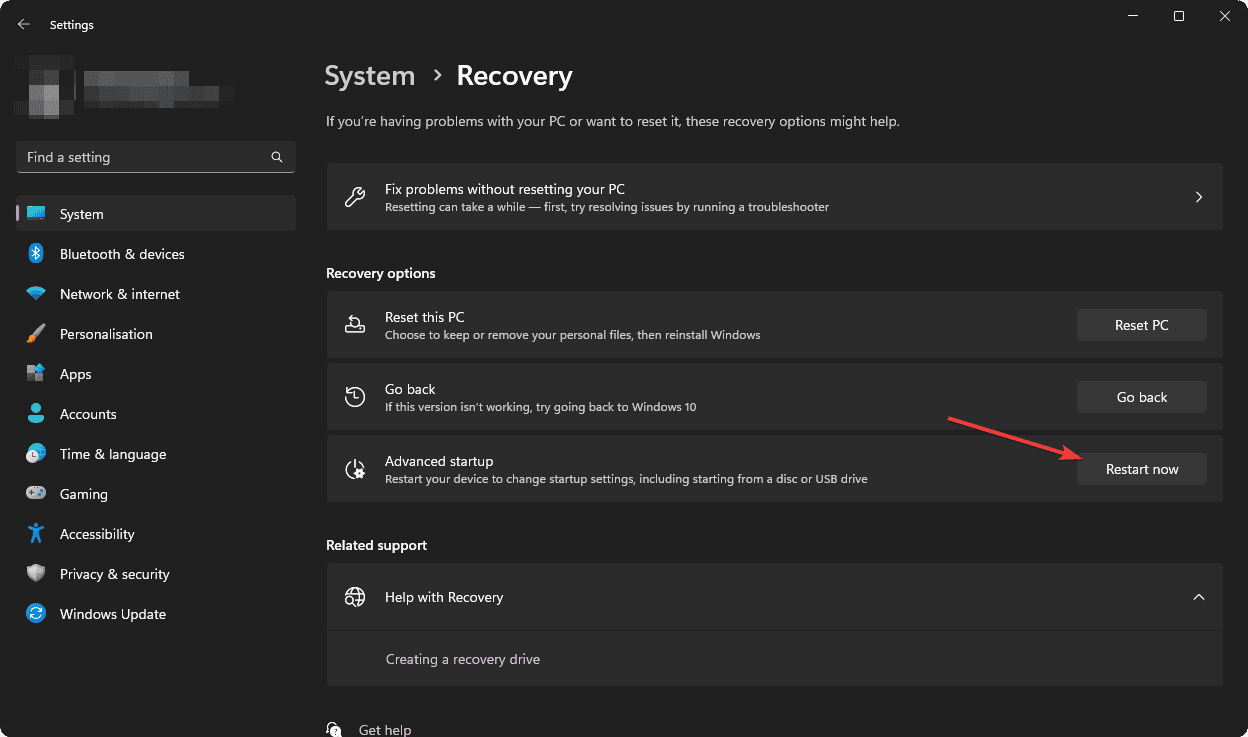
- Press the Win + I key to Open the Windows Settings.
- Click on System.
- In the right-hand menu, select Recovery.

- In the Advanced startup section, click on Restart now.
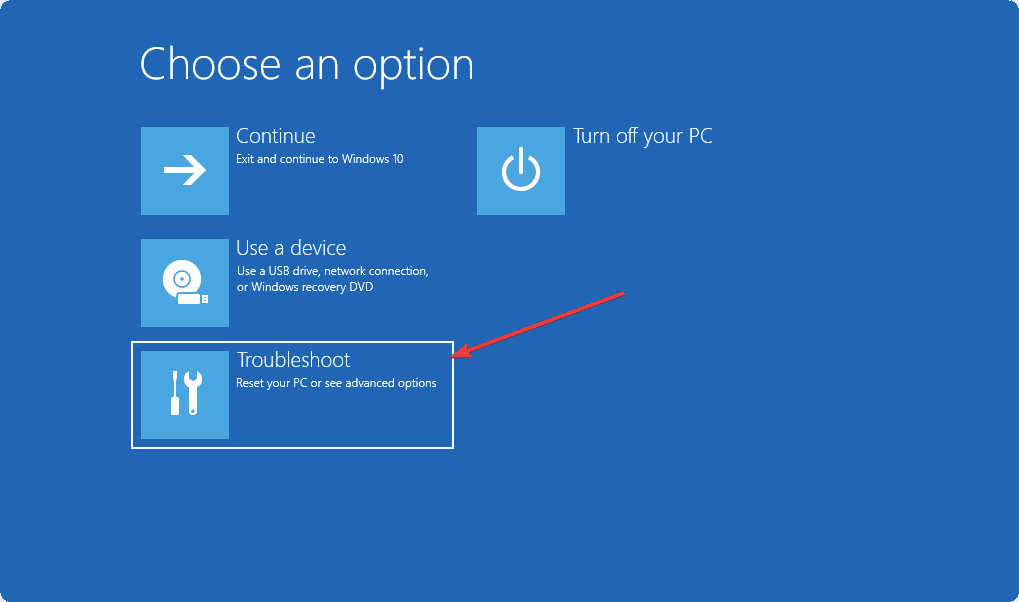
- Your computer will restart, and the Advanced Startup Options menu will appear.
- Select Troubleshoot from the options.
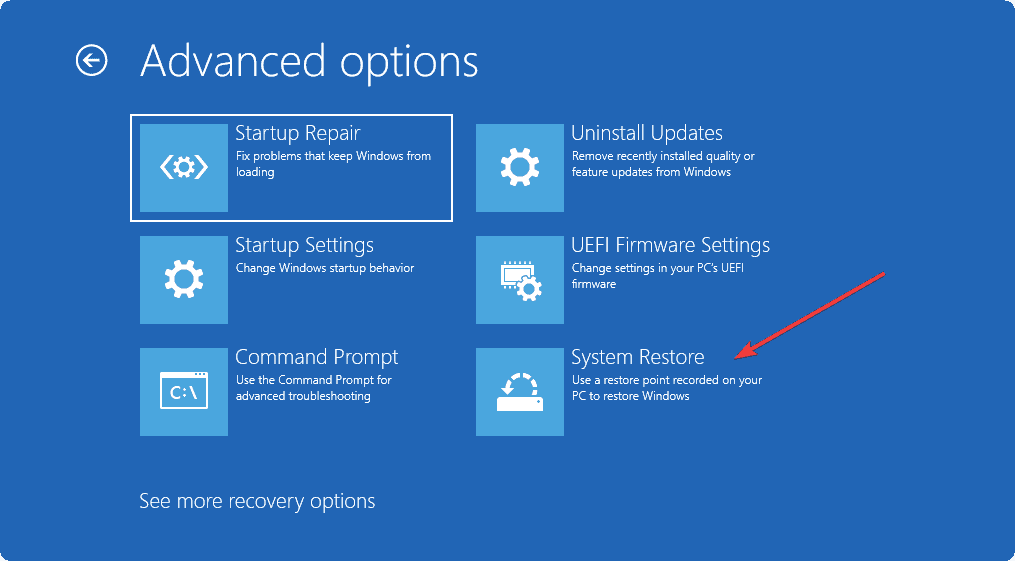
- In the Troubleshoot menu, choose Advanced options.
- Click on System Restore.
- Select the target operating system (if you have multiple) and click Next.
- You will now see the available restore points on your computer. Choose the desired restore point from the list.
- Click Next to proceed.
- Confirm your selected restore point and click Finish.
- Before proceeding, save any unsaved work and close all open applications.
- Click Yes to confirm that you want to restore the system.
- Windows 11 will now restore your PC to the selected state using the chosen restore point. The process may take some time, and your computer will restart during this process.
By following these steps, you can successfully restore your Windows 11 system to its previous state.
How long does System Restore take?
The duration of a System Restore can vary, typically taking anywhere from 15 minutes to a few hours. Small restore points with minor changes are quicker, while larger ones with significant changes take longer. It's essential to be patient during the process and avoid interruptions. Creating regular restore points can help make future restorations faster.
System Restore is a valuable tool that Windows 11 users can rely on to maintain a stable and secure system. By creating regular restore points and understanding the restoration process, you can troubleshoot issues efficiently and keep your computer running smoothly. With this knowledge, you can confidently navigate the world of computing, knowing you have a safety net in place to safeguard your PC.


