
Do you want to change your DNS settings on Windows 11? This article has everything you need.
If you're looking to boost your internet speed, enhance security, or bypass regional restrictions, changing your DNS (Domain Name System) settings on Windows 11 can help. Whether you're switching to Google DNS, Cloudflare, or OpenDNS, this guide will walk you through every step.
What is DNS?
DNS stands for Domain Name System. It's like the internet's phonebook — it translates human-readable domain names (like google.com) into IP addresses computers understand (like 142.250.190.78).
By default, your ISP provides DNS servers, but they may be slow, log your activity, or block certain websites. Switching to a public DNS can improve performance, privacy, and reliability.
Methods to Change DNS in Windows 11
There are three main ways to change DNS settings:
- Using Settings App (GUI)
- Using Command Line (PowerShell)
- Using third-party software
Let's learn about them one by one:
1. Change DNS via Settings App (GUI)
The most common and safe way to change the domain name server on your PC is by using the Windows 11 Settings app. To do it, follow these steps:
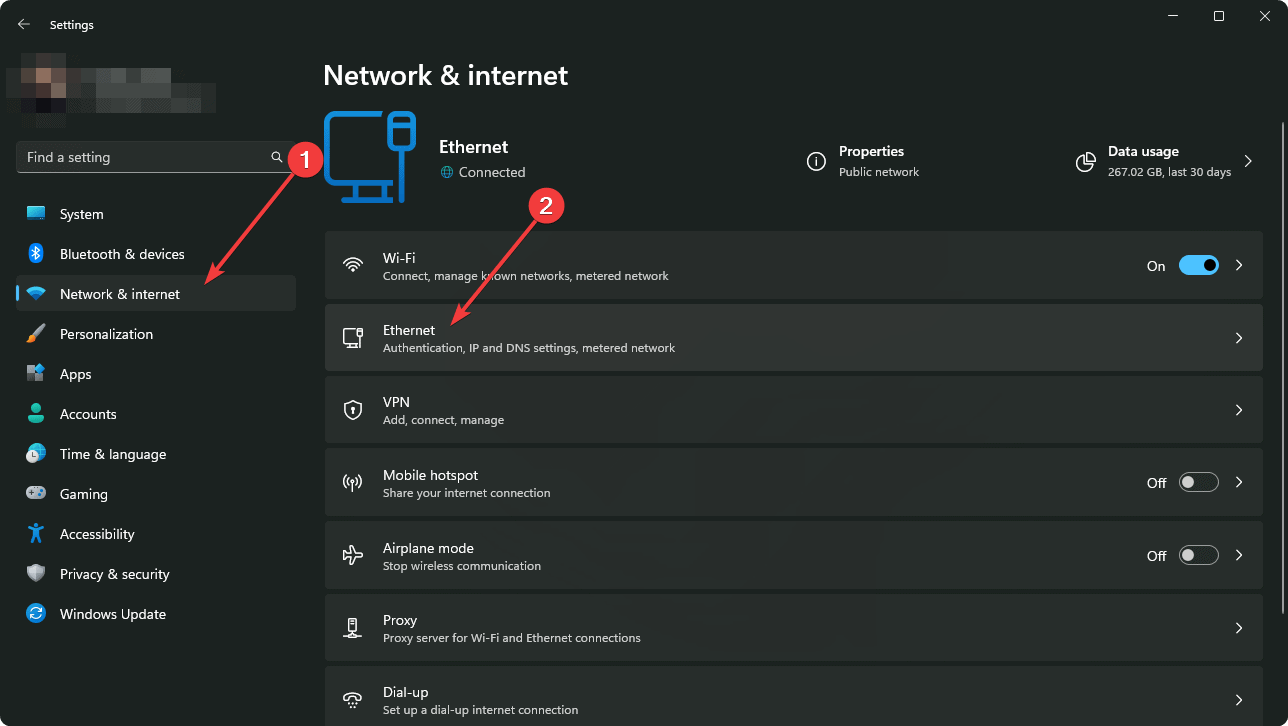
- Open Settings by pressing the Win + I on the keyboard.
- Go to Network & Internet from the left sidebar.
- Select Your Connection depending on which one you are using. For example, Ethernet.
- Click Edit next to DNS server assignment.
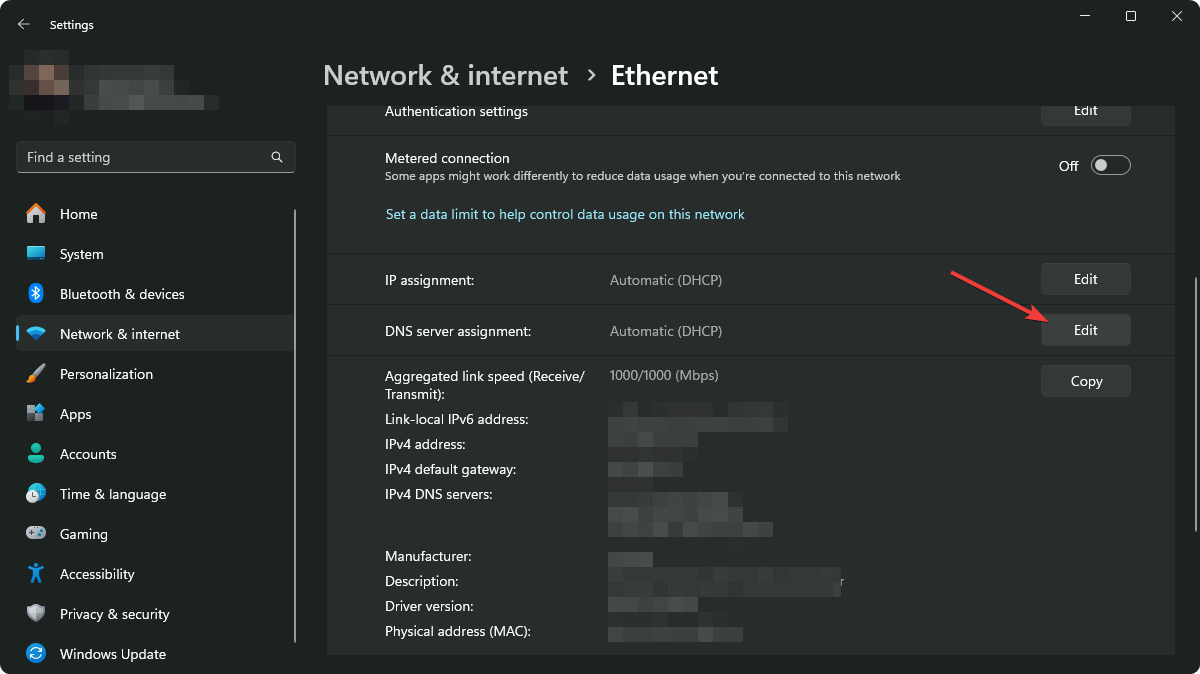
- Enable IPv4 or IPv6 by toggling the relevant switch according to your preference.
- Enter New DNS Addresses:
Examples:
- Google DNS:
- Preferred:
8.8.8.8 - Alternate:
8.8.4.4
- Preferred:
- Cloudflare DNS:
- Preferred:
1.1.1.1 - Alternate:
1.0.0.1
- Preferred:
- OpenDNS:
- Preferred:
208.67.222.222 - Alternate:
208.67.220.220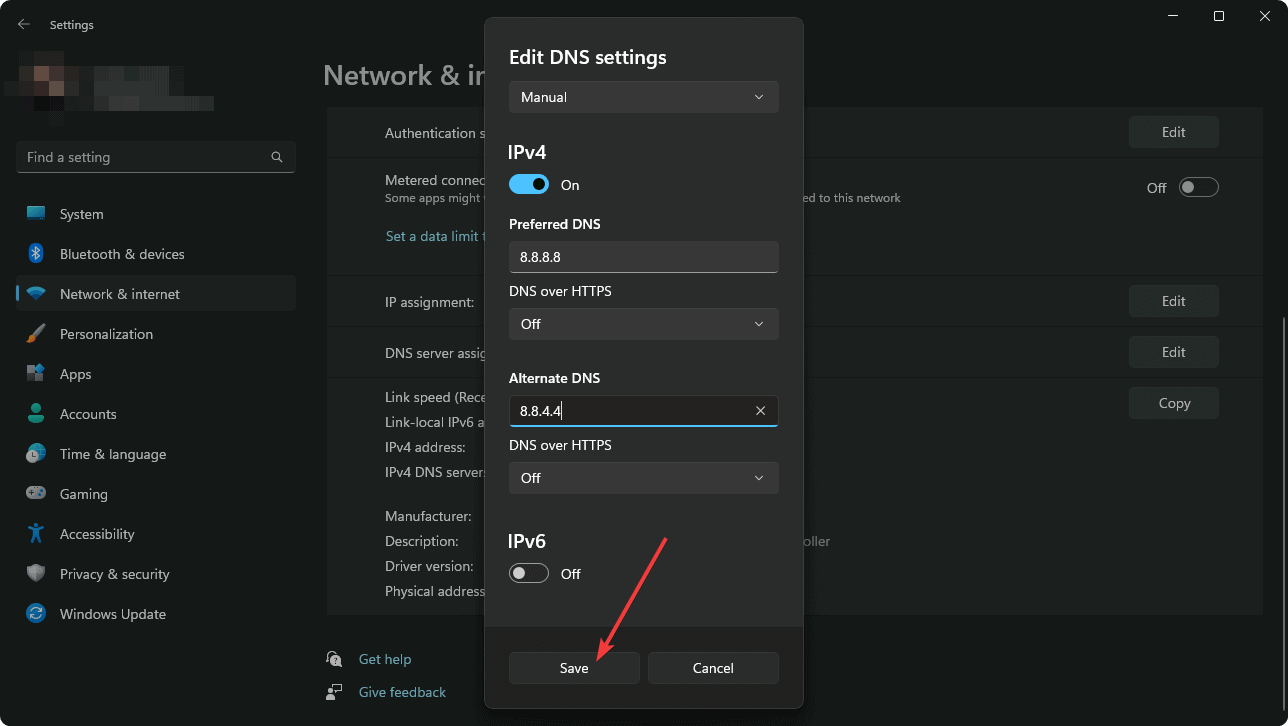
- Preferred:
Click Save. You're done!
2. Change DNS via PowerShell
There is another official method to change DNS. That's using the Windows Terminal or PowerShell. To do it, follow these steps:
- First, Press Win + X on the keyboard to open the Power Menu and then select Terminal (Admin).
- Get Network Adapter Name by executing the following command:
Get-NetAdapter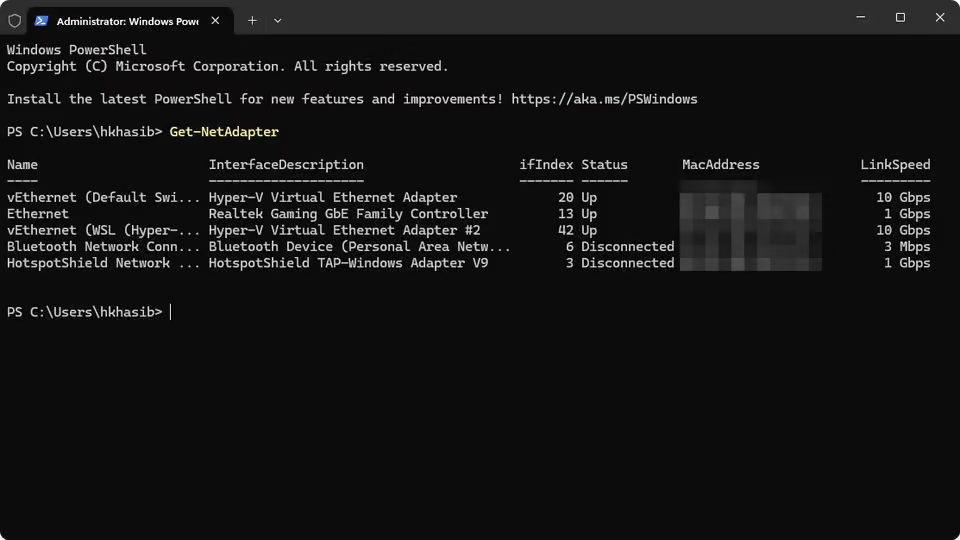
- Now, set the DNS Server (replace Ethernet with your adapter name) by running the following command:
Set-DnsClientServerAddress -InterfaceAlias "Ethernet" -ServerAddresses ("8.8.8.8", "8.8.4.4")
- Done.
3. Use Third-party software to change DNS
There are several DNS changing applications out there. For example, DNS Jumper, QuickSetDNS, etc. You can download and install those apps. Then, follow the on-screen options to change DNS settings conveniently.
How to Verify Your New DNS
- Open Windows Terminal like method 2.
- Run the following command:
nslookup google.com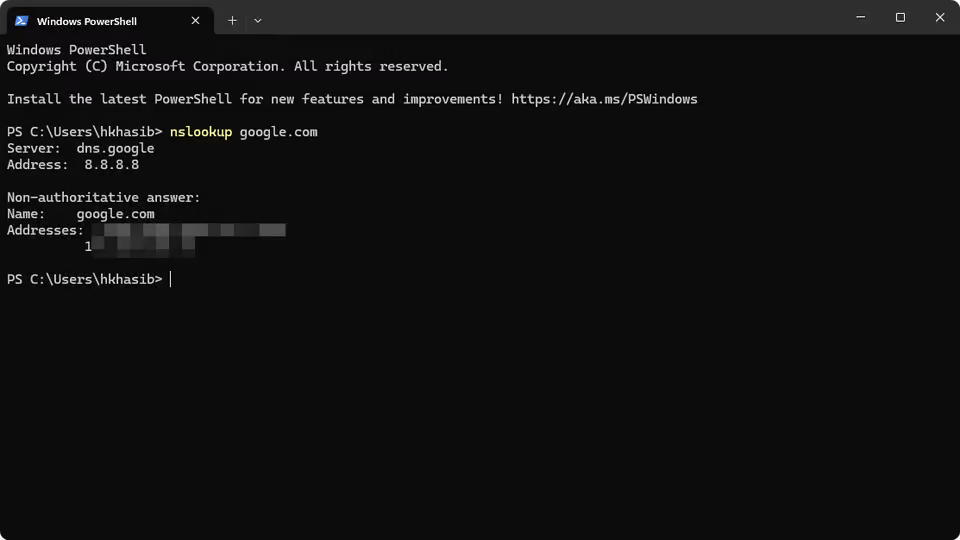
- Check the Server address in the result.
If you don't see the changes or don't notice any performance improvements after changing, consider flushing the DNS manually.
Bonus: Enable DNS over HTTPS (DoH)
DNS over HTTPS encrypts your DNS traffic. To enable it:
- Go to Settings > Network & Internet > Your Connection.
- Under DNS Server Assignment, click Edit.
- Choose Encrypted only (DNS over HTTPS) for each server.
Public DNS providers like Cloudflare, Google, and OpenDNS support DoH.
Changing DNS on Windows 11 is a fast and effective way to improve your network experience. Whether you're after speed, privacy, or control, the steps above will help you switch your DNS with confidence.


