
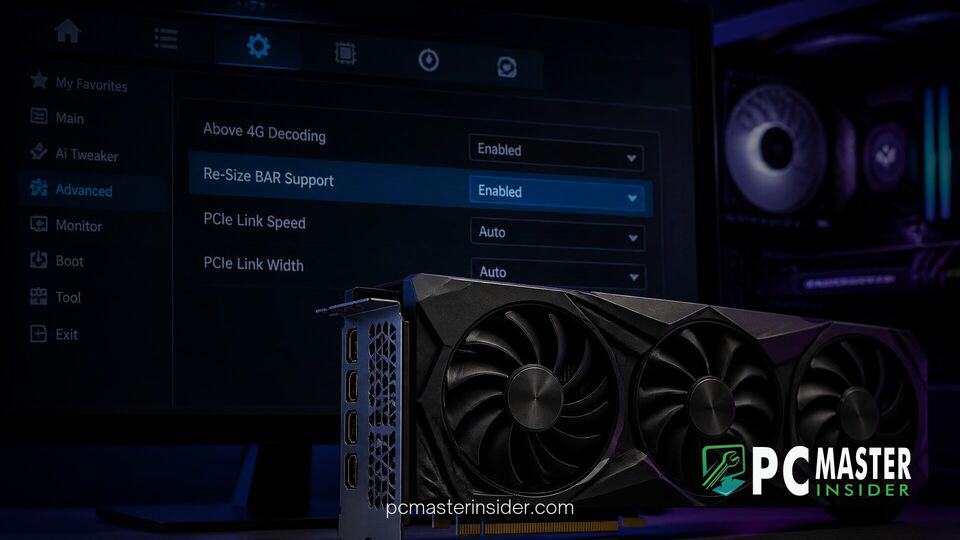
When gaming on a modern PC, frame drops and sudden micro-stutters often stem from a fundamental PCIe communication bottleneck rather than a lack of raw GPU horsepower. Traditionally, Windows processors can only access graphics memory in small, 256MB chunks. When complex 4K textures and detailed geometry need to transfer from system RAM to your graphics card, this queuing system causes memory overhead and lower 1% low frame rates.
Resizable BAR (ReBAR)—also known as AMD Smart Access Memory (SAM)—solves this bottleneck by allowing your CPU to request and access the entire frame buffer simultaneously. However, even if your hardware supports this feature out of the box, it remains disabled in most motherboard firmware by default. This step-by-step guide walks you through verifying system hardware support, updating your setup, and enabling Resizable BAR directly within your system's UEFI BIOS.
System Requirements for Resizable BAR Support
Before modifying any system firmware settings, you must verify that every hardware component and software layer in your system supports Resizable BAR. Skipping hardware verification can cause black screens or boot failures when changing boot modes.
Compatible Motherboards, CPUs, and Graphics Cards
To use Resizable BAR, your processor, motherboard chipset, and graphics card must support the PCIe interface feature:
- Graphics Cards: Nvidia GeForce RTX 30 Series (Ampere) or newer, AMD Radeon RX 6000 Series (RDNA 2) or newer, and all Intel Arc graphics cards.
- Processors: Intel 10th Gen Core CPUs or newer; AMD Ryzen 3000 Series CPUs or newer (excluding Ryzen 3000G APUs).
- Motherboards: Intel 400-Series chipsets or newer; AMD 400-Series chipsets or newer (running updated AGESA firmware).
- Partition Style: Your boot drive must use the modern GUID Partition Table (GPT) format rather than the legacy Master Boot Record (MBR) style, as UEFI boot mode is strictly required.
Checking Current ReBAR Status in Windows
You can verify whether ReBAR is currently disabled or already active on your PC using native control panels or free diagnostic software.
For Nvidia GPUs, right-click your desktop and open the NVIDIA Control Panel. Click System Information in the bottom-left corner, select the Display tab, and look for Resizable BAR. If it says No, the feature needs to be enabled in your BIOS.
For AMD GPUs, open AMD Software: Adrenalin Edition, navigate to Performance > Tuning, and scroll down to check if AMD Smart Access Memory is toggled on. Alternatively, free system tools like GPU-Z show your ReBAR status directly on the main graphics card overview tab.
If you encounter performance issues in games after tweaking display options, you can also learn how to enable HAGS and Game Mode in Windows 11 to fix FPS drops alongside ReBAR.
Step-by-Step Instructions to Enable Resizable BAR
Follow these structured steps to prepare your system drivers, enter your system firmware menu, and activate the necessary PCI options.
1. Update Drivers
1.1. Install Latest Graphics Driver
Ensure your graphics card is running the latest software driver release. Visit the official Nvidia, AMD, or Intel driver download pages, run the executable package, and perform a standard update installation to ensure full driver-level ReBAR support.
1.2. Update Motherboard Firmware
If your motherboard was manufactured before 2021, download the latest BIOS update from your motherboard manufacturer's support site. Flash the updated BIOS using a USB drive in your board's flash utility. For instance, recent board updates often contain stability patches, similar to how a Gigabyte BIOS update hints at Intel Raptor Lake Next desktop CPUs support.
2. Verify Partition Format
2.1. Open System Information
Press Win + R, type msinfo32 into the Run box, and hit Enter. Locate the BIOS Mode entry. It must display UEFI rather than Legacy.
2.2. Convert Disk to GPT if Necessary
If your system lists Legacy mode, your boot drive is formatted in MBR mode. You must convert your disk to GPT using Windows' built-in mbr2gpt /convert /allowFullOS command in an administrative Command Prompt before switching your BIOS to UEFI mode.
3. Restart into BIOS
3.1. Trigger Windows Advanced Startup
Press Win + I to launch Windows Settings, head to System > Recovery, and click Restart now next to Advanced startup.
3.2. Select UEFI Firmware Settings
When the blue recovery screen appears, navigate to Troubleshoot > Advanced options > UEFI Firmware Settings, and click Restart to boot straight into your motherboard firmware.
4. Accessing the Motherboard UEFI BIOS Setup
4.1. Use Boot Keys
Alternatively, restart your PC manually and repeatedly press your motherboard's designated setup key during the POST splash screen. On most custom desktop systems, this is Del or F2. On laptops or OEM prebuilt desktops from HP, Dell, or Lenovo, press F10 or F12.
4.2. Switch to Advanced Mode
Once inside the motherboard interface, switch from Easy Mode to Advanced Mode by pressing F7 (common on ASUS, MSI, and ASRock boards).
5. Enabling Above 4G Decoding and ReBAR in BIOS Settings
5.1. Disable Compatibility Support Module (CSM)
Navigate to the Boot or Security tab, locate CSM (Compatibility Support Module), and set it to Disabled. Disabling CSM forces the motherboard to run in pure UEFI mode, which is mandatory for large PCIe address mapping.
5.2. Turn On Above 4G Decoding
Navigate to the Advanced, PCIe Subsystem Settings, or Chipset Configuration menu. Find the entry labeled Above 4G Decoding and switch it to Enabled. This allows 64-bit PCI devices to allocate memory addresses above the 4GB memory boundary.
5.3. Enable Resizable BAR Support
Directly beneath the 4G Decoding option, locate Re-Size BAR Support, Resizable BAR, or Smart Access Memory. Change its value from Disabled or Auto to Enabled.
5.4. Save Settings and Exit
Press F10 on your keyboard, select Save Changes & Exit, and hit Enter. Your computer will automatically reboot into Windows.
Verifying Resizable BAR Activation and Troubleshooting
Once your PC reboots, you should confirm that the feature is actively operating within your operating system graphics subsystem.
Confirming Functionality in Driver Control Panels
To verify activation on Nvidia GPUs, open the NVIDIA Control Panel and re-check System Information. The Resizable BAR row should now display Yes. For AMD Radeon owners, open AMD Software: Adrenalin Edition, check the Performance tab, and confirm that AMD Smart Access Memory displays an active status indicator.
You can also check Windows Device Manager by pressing Win + X, selecting Device Manager, expanding Display adapters, right-clicking your GPU, and selecting Properties. Under the Resources tab, if you see an entry named Large Memory Range listed alongside Memory Range allocations, Resizable BAR is actively functioning at the system layer.
Resolving Common BIOS Settings and Boot Issues
If your system experiences black screens, boot loops, or missing BIOS options, check these common fixes:
- Black Screen After Disabling CSM: This happens if your Windows installation drive is formatted with an MBR partition style instead of GPT. Clear your CMOS jumper or remove the CR2032 motherboard battery for 5 minutes to reset BIOS defaults, boot into Windows, convert your disk to GPT, and re-enable UEFI boot.
- ReBAR Setting is Grayed Out: Motherboard firmware requires Above 4G Decoding to be toggled to Enabled before allowing access to the ReBAR dropdown. Enable Above 4G Decoding first, then re-examine the menu.
- GPU VBIOS Incompatibility: Early Nvidia GeForce RTX 30 Series graphics cards (such as Founders Edition or third-party RTX 3080/3070 cards released in late 2020) require a GPU VBIOS update to support ReBAR. Check your GPU manufacturer's software utility (e.g., EVGA Precision X1, MSI Center, or ASUS GPU Tweak) to flash your graphics card firmware safely. Maintaining secure VBIOS releases is critical, as seen when Sapphire releases a vBIOS security update for Radeon GPUs.
Best Practices and Tips for Maximum GPU Performance
To keep your system running smoothly with Resizable BAR enabled, keep the following best practices in mind:
- Keep Drivers Updated: GPU vendors continuously optimize Resizable BAR profiles for new game engines in each driver release. Use tools like GeForce Experience, AMD Adrenalin, or automated update software (you can read our review on Driver Easy Pro to see how driver updater tools work) to keep graphics software current.
- Monitor Frame Stability: While average FPS usually increases by 3% to 15% with ReBAR active, its biggest benefit lies in improving 1% low frame rates and removing frametime micro-stutters in asset-heavy open-world games.
- Profile Incompatible Titles: A very small subset of older DirectX 9 or DirectX 11 games may experience slight performance drops with ReBAR enabled. Nvidia automatically whitelist-manages supported games inside its graphics drivers, but you can override profiles globally using tools like Nvidia Profile Inspector if needed.
- Combine with System Optimizations: Ensure your CPU power profiles, memory XMP/EXPO profiles, and Windows performance settings are configured properly to prevent secondary system bottlenecks. If you are tuning overall system performance, keep an eye out as Microsoft confirms major Windows 11 performance upgrades that further streamline system memory handling.